Installing a bathroom vanity unit can be satisfying if you have the time and inclination. You can not only choose a design for your new bathroom, but it also helps save money when hiring a contractor. This guide will be perfect for beginners and homeowners wanting to redo their house interior or try something new.
By the time you finish reading this article, you’ll realise how easy it is to install bathroom vanity units, even if it is your first time doing it. Selecting products such as the BELOFAY 400mm Vanity Unit that are easy to install, compact, and have a solid construction makes this project particularly rewarding. By following these guidelines, you will have a well-installed vanity unit that will complement your bathroom drainage system and add beauty to your bathroom.
Step 1: Gather Your Tools and Materials
To have the best experience when it comes to bathroom vanity unit installation, it is essential to have some of these tools and materials. Start with the basics: Most tools include a screwdriver for twisting screws, a level so surfaces will be evenly made, a wrench for tightening bolts, and a drill for drilling holes.
Consider using BELOFAY sink waste trap and bathroom mixer tap which are better in quality and durability if you want good drainage in the sink and a better way of controlling water. Having these materials ready means you can move smoothly in the middle of the project, making the installation less of a process and more of a formality.
A quick tip: Preparing the tools and products you will use before starting is also essential. This preparation step reduces disruption and makes it possible to do clean works that give a professional outlook for your DIY work.

Here’s an in-depth look at each aspect:
Basic Tool List
- Screwdriver: This tool is essential to keep screws tight in vanities, taps, and any type of plumbing fixtures. A flat and Phillips screwdriver are standard, so it is always preferable to carry both with you. A good screwdriver will prevent you from damaging screws and also appropriates the proper force to be applied.
- Level: A level guarantees that every installation is critical when fitting bathroom fixtures such as vanity units and cabinets. Everything looks better when levelled properly, and you don’t have problems such as water accumulating or cabinet doors not closing as they should.
- Wrench: Most wrenches need to be used when loosening or tightening nuts and bolts of fixtures, particularly those dealing with plumbing. An adjustable wrench is helpful for numerous sizes and nuts and takes less space in the toolbox than a set of nut wrenches of different sizes.
- Drill: In most cases, it is necessary to drill through the bathroom wall, and it is recommended to use power and accuracy, mainly when working with tiles or drywalls. A cordless drill is comfortable to use and guarantees you can install screws correctly, especially if mounting objects that are relatively massive, for example, vanity units.
Specialised Tools
- Silicone Sealant: Silicone sealant must be used in the bathroom to lay down water-tight bands around built-up areas, mainly the sink and bathtub area. It does not allow water to infiltrate spaces that could otherwise lead to mould or mouldy growth. Do not forget to have a caulking gun nearby because it helps to apply the sealant much more accessible and gives better control.
- Cabinet Levelling Tools: These tools help create a level and a flat surface on which your bathroom vanity unit will be placed, especially if the bathroom floor is not levelled. Cabinet levelling tools also give you a mechanism for levelling every corner of the unit so that it will not rock or tilt. To do this, a good number of screws are tightened to guarantee the unit remains steady and doors and drawers in the unit would glide as expected in the future.
Recommended Product Mentions
- BELOFAY Sink Waste Traps: This product is essential in drainage processes to avoid blockage. The sink waste traps of BELOFAY are well constructed for attack, wear, and tear, ease of usage, effective blockage prevention, and efficient water control. For any bathroom sink installation, a quality waste trap is vital to your sink’s draining mechanism and ability to avoid clogging.
- BELOFAY Bathroom Mixer Taps: Selecting a good and standard tap, such as the bathroom mixer tap of this BELOFAY brand, ensures control of both hot and cold water. It only has one rotating handle for water temperature control, and it is efficient with one locking handle, which offers the appearance of the current bathroom design.
Preparation Tip
- All the tools and materials must be planned to ensure none will be used in this stage. This preparation step makes the process seamless and quick since you cannot call for a specific tool you realise is missing.
- Storing your tools where they are easily accessible and can be arranged in the order they are to be used saves time making further movement, increasing the time spent working.
- Eliminating mid-project disruptions is possible by doing quality checks, such as confirming some tools are operating before being used and finalising sealant to avoid using year-old silicone sealant in the final parts.
In this regard, keep these points in mind so that your bathroom installation can change from complicated to manageable, thus delivering a polished and professional job.
Preparation: Removing the Old Vanity Unit
Step-by-Step Instructions
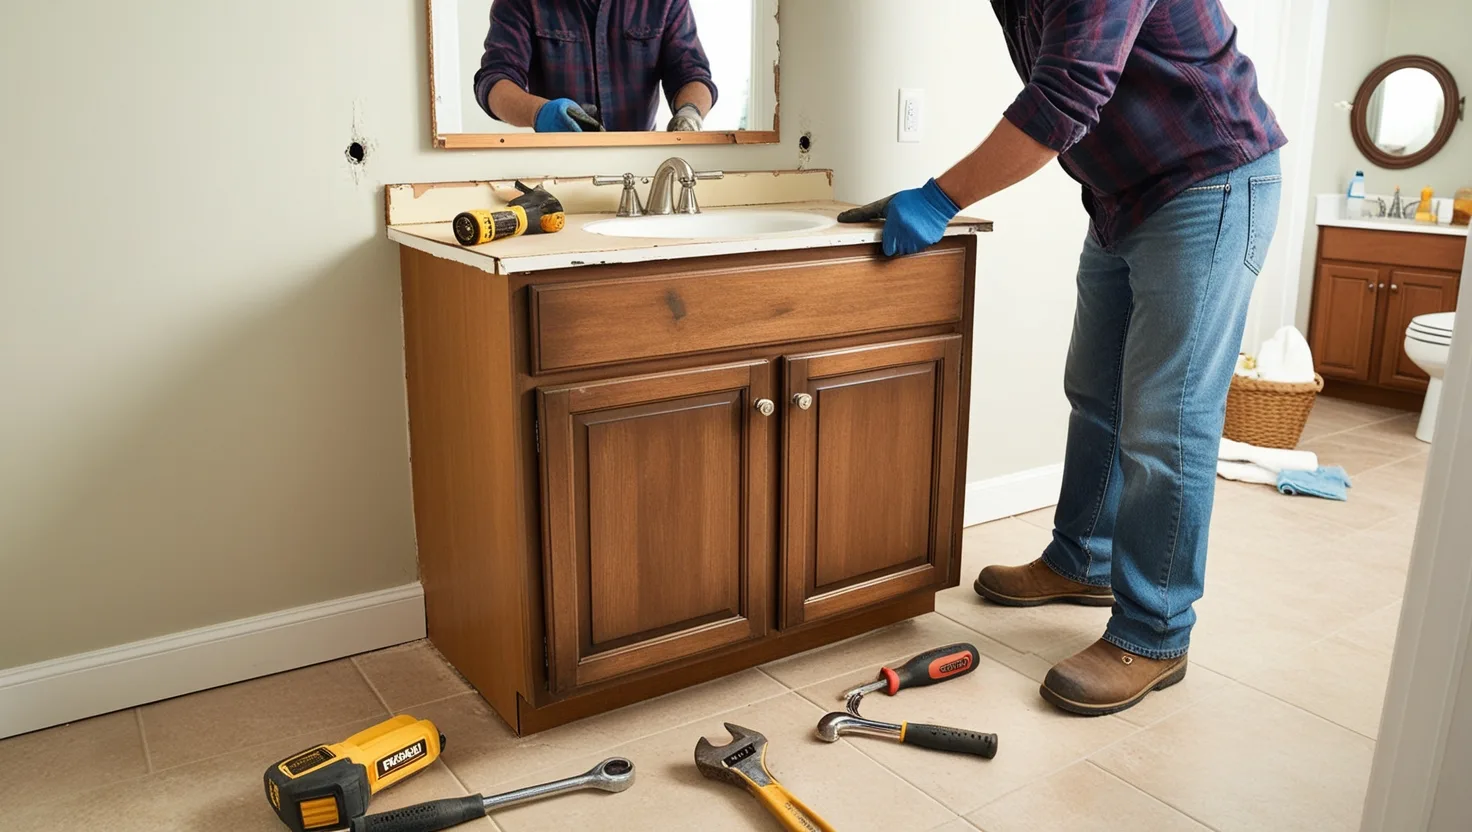
Here is a step-by-step guide on removing an old vanity, including preparation, tools, and safety measures. To make the removal process easy and prepare your workplace for the installation of the new vanity, follow these steps.
Turn Off the Water Supply
- Find the shut-off valves for hot and cold water, usually, these are small round or oval knobs located near a wall surface of the house or any other building. Rotate each one of the valves to the right until all the water flow is shut down.
- When you are ready to shut down, turn off all the valves and open the faucet to clear out any water left in the pipes to avoid leakage when removing the plumbing.
- If the valves are rusty or stiff to turn, consider replacing them when the vanity is removed. Typically, these are small round or oval knobs positioned near the wall. Twist each valve clockwise until fully closed to cut off the water supply.
- After turning off the valves, open the faucet to drain any remaining water in the lines, preventing leakage when disconnecting the plumbing.
Disconnect Plumbing
- Bring a bucket and stand it under the P-trap, a U-shaped pipe connecting the sink drain to a wall. In this area, water can stagnate after the main supply is shut off, often for hours or even days.
- With an adjustable wrench, unscrew the nuts where the water supply lines are connected to the faucet, beginning with the supply lines and then moving to the P-trap.
- Gently detach each segment to remove water that would fall into the bucket. If the P-trap or other pipes have corrosion, you should replace them so their installation will flow perfectly with the vanity.
- Lastly, remove the sink drain pipe. Some hidden areas, such as under the sink, may require a basin wrench. When the old vanity is removed from the bathroom, the existing pipes need to be checked for rust/tear; this will be an excellent time to fix it since the new vanity is already installed.
Remove the Old Vanity
- Look over for any screws and brackets used to fix the vanity to the wall. These fasteners are usually placed on an area of the vanity cabinet’s internal structure behind the visible area. You should use a screwdriver or a drill to remove them.
- Once the screws or brackets have been removed, you should endeavour to pull the vanity away from the wall. If the vanity contains a countertop, it might be quite bulky, so use your back more and consider involving someone to help you.
- When demolishing the vanity, make sure you have checked the wall for any sign of caulking or adhesive that joins it. You can use a sharp edge or a utility knife to make score marks along the perimeters and break the bond without affecting the wall finish.
- Consider setting the vanity and sink aside while selecting heavy materials such as ceramic or stone tops. It may not always be safe to have clutter in that area since moving around the place may lead to mishaps, so keep the area clean for smooth and easy vanity installation.
Safety Precautions
- Protect Yourself with Gloves and Safety Goggles
The nature of jobs that involve plumbing fixtures and vanity components contains risks such as handling sharp-edged objects and coming into contact with dirt and rust. Aprons, heavy-duty gloves and safety goggles are essential in handling dangerous materials to avoid contamination and possible injury, including skin infections.
- Watch for Unexpected Water Leaks
They also discovered that even by turning the supply off, dripping could occur when removing the pipelines. It will also help store a bucket and several towels near a washbasin to react instantly to water overflow and save your bathroom floor from becoming marred.
- Be Cautious of Heavy Lifting
Vanity removal is typically a two-man-partition project due to structures like stone counters. Do not exert pressure on your body and, if required, use assistance to lift some of the massive parts of the devices.
Disposal
For eco-friendly disposal options, consider the following:
- Local Recycling Centers
Most recycling centres collect old cabinetry, countertops, and bathroom fixtures. Using these materials reduces landfill waste, making the world a better place to live. Always check with the local centre; they will tell you what items they take and if any special preparation is needed.
- Donation Centers
If your old vanity is still serviceable in many ways, some charities or community services will take it. Not only will this reduce waste, but it will also benefit some families or organisations who need it. There must be groups like Habitat for Humanity that take household fixtures for reuse.
- Resale or Repurposing
You can sell the vanity online if it is still usable and not severely damaged, especially if you can still use it. Most DIY fanatics hope to repurpose the bathroom cabinetry for other home improvement undertakings. Possible reuse options can be glamorous since they entail returning items to the community without going to the dump.
Disposing of the old vanity rightly paves the way for a proper mode of fixing your new one while allowing you to make an appropriate disposal decision. By following these steps, you get a reasonably safe, very efficient process with minimal waste and get as much use out of everything as possible.
Measuring and Marking for Installation
When placing and fixing the bathroom vanity units, it is critical to measure correctly to realise a perfect professional touch. It does not matter if you select a 400mm, 500mm, or 600mm vanity unit; These steps will teach you essential measurement and marking guidelines for any successful installation project.

Measuring Tips
Assess the Available Space
The most essential step is assessing the walls set to bear the vanity. Check the overall measurements, the width, height, and the depth, according to the space one has to allocate for the vanity unit. The 400mm vanity units might be installed in small bathroom spaces, and the 600mm models can fit well in large bathroom environments.
Determine the Ideal Height
An ideal height range for vanity units is 800-900mm or even slightly more, but the position depends on preference. Subtract from this measurement the distance up to this mark on the wall with a view of providing enough space for the users to have full, convenient access. If your vanity has two sinks and includes a separate basin, consider whether or not there is an additional 2-3 inches in height from the countertop or basin.
Account for Plumbing and Fixtures
When there are plumbing lines, taps, or other additional fixtures, measure around them. The positioning of the vanity unit should not interfere with the existing pipework and the house’s electricity supply. Also, ensure that at the top of the unit, there is enough space above for taps or faucets and enough side space for users to manoeuvre around the unit.
Ensure Level Surfaces
The floor or wall for fixing the vanity must be level, for this, you should consider a spirit level. Sometimes, the surface may be irregular and vanity may need to be levelled with the ground when shims or levelling feet are used. This is particularly the case with larger units because of stability matters.
Measure Twice, Cut Once
This is a relevant rule in most DIY projects. Cross-check all measurements to reduce any possibility of errors. Misalignment of vanities leads to structural problems and an overall crooked appearance.
Marking for Brackets
Once the measurements are taken and checked, the next step is to take the necessary measurements to mark the wall for bracket placements. Appropriate placement of brackets on the shelf helps in the stability or alignment of the installed vanity unit.
Identify Bracket Placement
When selecting the location for the brackets, you should do so according to the size of your vanity: 400mm, 500mm, or 600mm. Usually, the brackets will be placed near the rear of the bathroom vanity to ensure the top relatively balances the structure and the unit rests securely against the wall.
Use Studs for Added Stability
For maximum strength, it is recommended to align brackets to the wall studs. Studs are vertical wooden beams behind the drywall that support hanging something. Studs are best identified with a stud finder, specifically when dealing with larger ones; it is essential to locate them. If studs are not available, then the wall anchors can be a good substitute for use as well.
Mark the Bracket Locations
With a pencil, draw small, neat dots on the wall where the brackets are to be screwed in, and ensure the dots are made at the appropriate distance apart by the vanity’s width. A measuring tape here can be helpful to ensure equal distances between the plants.
Check alignment with a Spirit Level
After reading the marks, check the level of each mark on the wall by using a spirit level. This measure is imperative to avoid a tilted vanity. If one of them is slightly offset, angled, or oriented improperly, they need to be adjusted before a hole is drilled.
Prepare for Drilling
With the bracket position determined indicating where the holes will be drilled through the wall, mark the exact middle point of each bracket location. It will also ensure that the brackets are well placed on the wall so they do not fall off easily. It is also important to use the correct drill size depending on the wall type to give maximum anchor to the vanity.
Once the measurements and brackets’ positions have been indicated, you should double-check the once-over of all that has been done. Verification helps to prevent a situation where some placements will need to be corrected once the vanity is fixed in place.
Spending time for careful measurement and making the marks will be worth it for a strong and correctly mounted bathroom vanity unit that gives the room a befitting aesthetic look and serves the bathroom function safer.
Securing the Vanity Unit to the Wall
The BELOFAY bathroom vanity unit can either be mounted on the wall or freestanding. Its installation entails correct fixing as the unit must be firm enough for the intended purpose and have an excellent aesthetic fit.
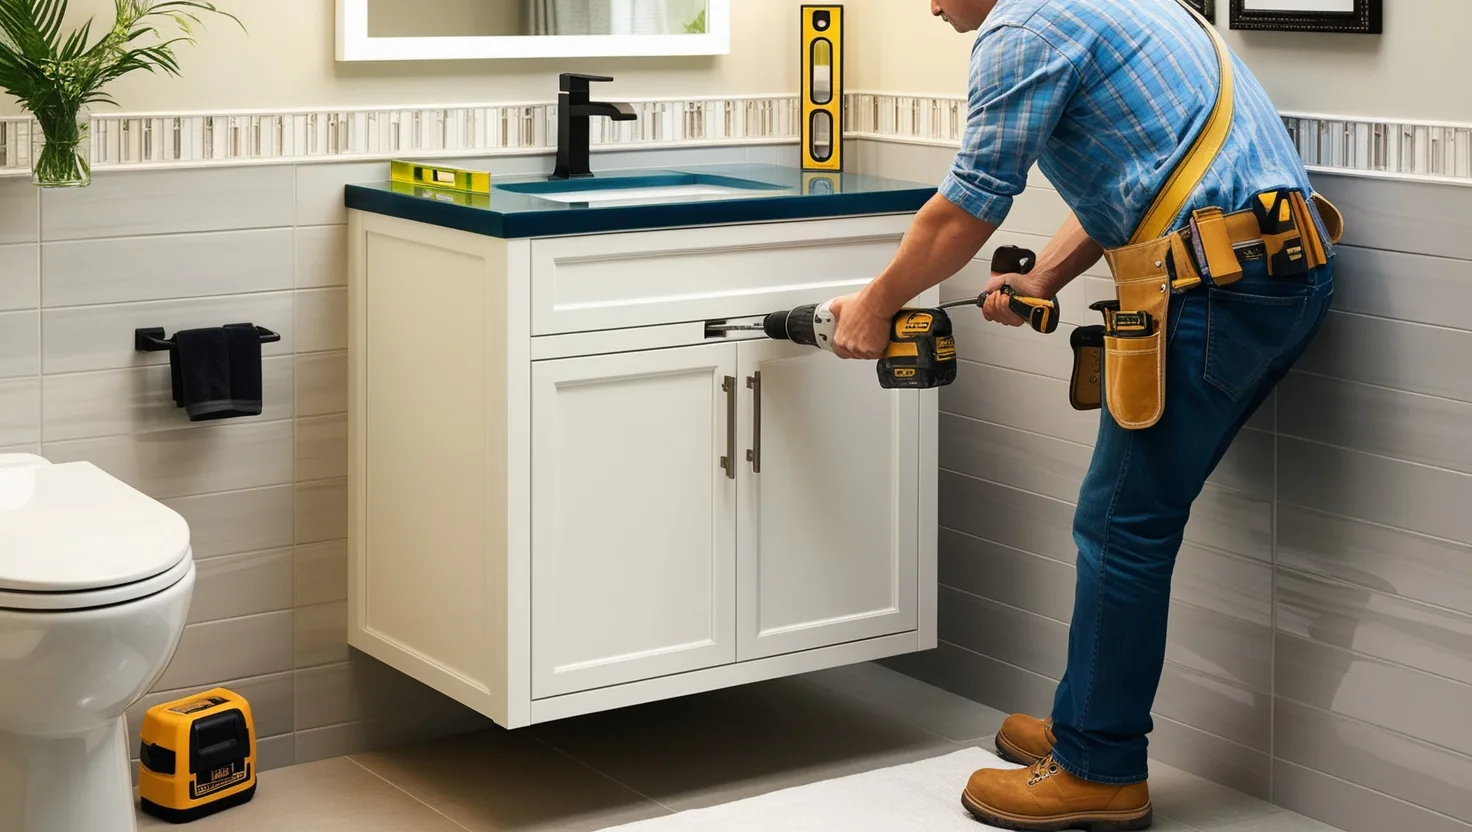
Mounting Instructions
The following steps will help you safely mount your unit on the wall without incurring alignment or stability problems that often result from some common mistakes.
Position the Unit
First, you should place your vanity unit correctly by fixing it on your wall and ensuring that it aligns with the marks you made during the measuring and marking process. If it is a wall-mounted unit, there should be someone beside you to hold the unit while you attach the brackets.
Attach Brackets to the Wall
In the case of the wall-mounted units, first, drill pilot holes on the wall in the positions you have made the bracket marks. Make sure that the holes are drilled in the right direction and size to allow the proper grip of the frame. Subsequently, fasten the brackets into the screws to intertwine them properly. All studs can be used as attachment points so structures will be more rigid. If no studs are available, use heavy-duty wall anchors suitable for the wall you want to use.
Secure the Vanity to the Brackets
Screw the brackets, and then using these, lift the vanity unit on top of them, ensuring that it fits properly onto the wall. Ensure the unit is tightly fixed against the wall and levelled where necessary. Screw all nuts on until the unit is tightly fixed onto the wall.
Double-Check Stability
Regarding additional independent units, it is essential to check that they are not tilted or inclined in any way. Pressure is applied to various sections in the BELOFAY freestanding vanity units to ensure they do not vibrate.
Common Mistakes to Avoid
Not Checking Stud Placement
One of the mistakes builders make is omitting brackets to wall studs properly or using the wrong anchors. This results in sagging over time, more so with large units, and usually necessitates reinforcement from behind the façade by the owner afterwards. Always use a stud finder before affixing the stud, or use the best quality anchors if studs are unavailable.
Uneven Bracket Installation
Loose screws on the back side of the vanity are seen to make the vanity tilt and therefore do not suit the appearance or operation of the vanity well. Use a spirit level to confirm your alignment on each step.
Neglecting Pre-Drilling
Making holes in advance helps avoid damage to the wall and guarantees the screws will be tightened in place tightly. If this is omitted, the surface on which the mass is to be mounted cracks or gets weakened somehow.
Avoid these mistakes to ensure your bathroom vanity unit is stable, looks great and is beautifully mounted.
Installing the Basin and Tap
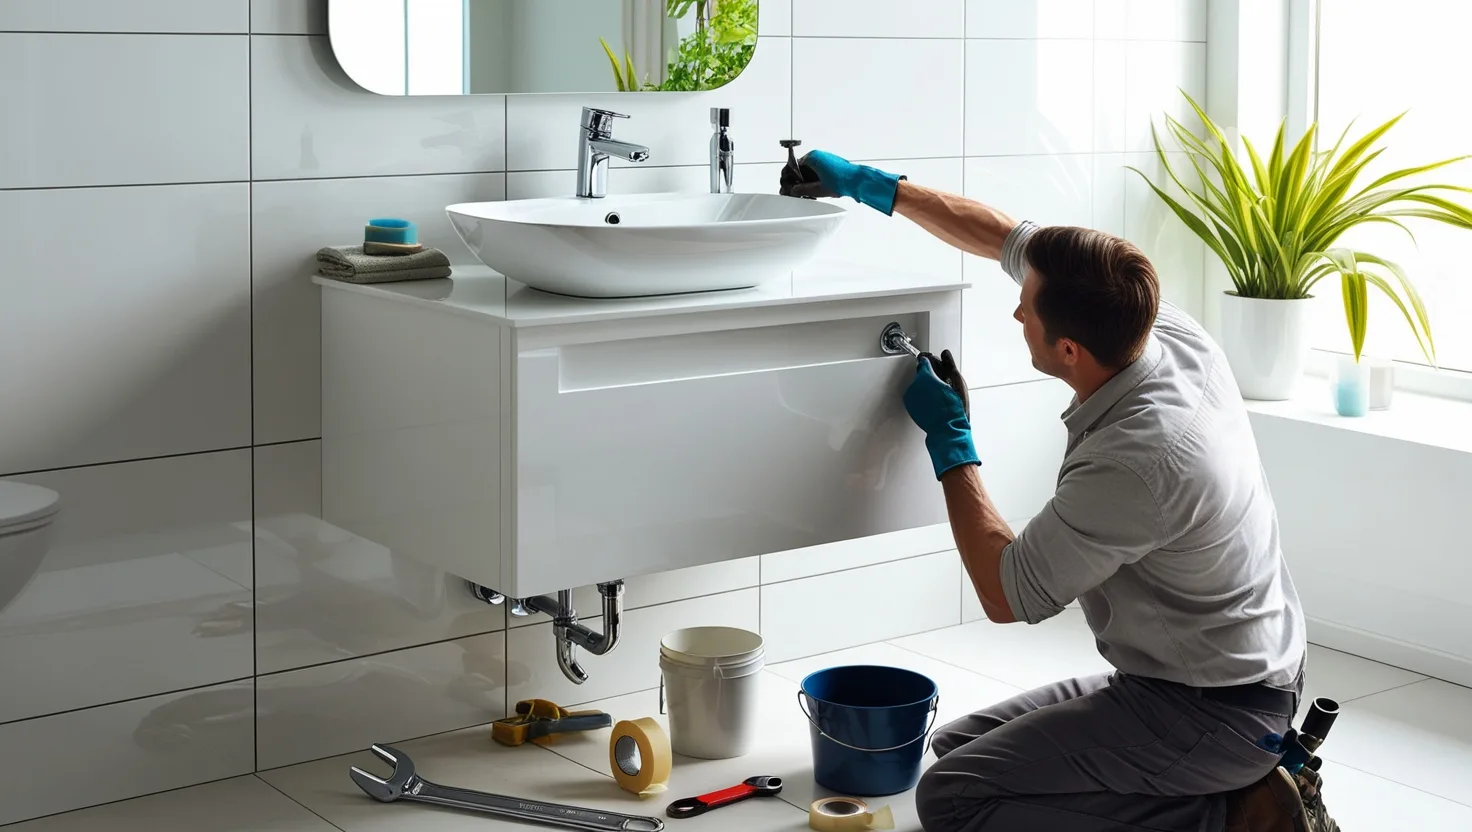
A basin and a tap complete the BELOFAY vanity unit setup and solve the unit’s functional importance while enhancing its design. Here are the detailed instructions on how to install the basin securely, fix the BELOFAY bathroom mixer tap, and seal the basin to give perfect leak-free solutions.
Basin Placement
Positioning the Basin
Put the basin right on the top of the vanity unit and make sure that it is in the middle of the vanity unit or, in other words, aligned with the edges of the vanity unit. Finally and again, ensure that the drain hole in the basin is correctly lined with the cutout made on the vanity’s surface so that it can drain when connected properly.
Securing the Basin
Some basins feature mounting brackets or screws to which they can be fitted directly onto the vanity. If your basin has these, you should fasten it according to the manufacturer’s recommendation. For other basins, if well aligned, you will use the silicone sealants to form an adhesive and seal all simultaneously.
Installing the BELOFAY Bathroom Mixer Tap
Assembling the Tap
Pop off the BELOFAY bathroom mixer tap from its packaging, and in case there are washers or rubber gaskets that go on the screws of the BELOFAY tap, then place them on properly to make a seal. Mount the tap by fitting the stem recommended hole on the basin.
Securing the Tap
From the underneath side of the basin, fix the tap in position using the fixing nut or screw designed for the purpose. Screw these on firmly, but do not overtighten them since this will damage the basin material.
Water Supply Connection
Connect the hot and cold water supply hoses to the connectors of the tap. Make sure you join the hoses to the perfect hot and cold inlets. With an adjustable wrench, add force to the connectors just enough but not too much force, lest the fittings be damaged after connecting; turn on the water supply gradually and check for signs of leakage.
Sealing the Basin
Preparing for Sealing
Wipe over the edge where the basin is fitting against the vanity surface to ensure there is no dust or anything like that. A clean, dry floor ensures the gel seal sticks better to the floor, and provides a watertight finish.
Applying Silicone Sealant
Apply a thin, clean bead of premium quality mould-resistant silicone sealant over the joint between the base of the basin and the vanity. To apply, first, fill the silicone into a caulking gun and then take the applicator and start applying the sealant at one end by gently applying on the trigger.
Smoothing the Sealant
When applying the sealant, use a sealant smoothing tool or your finger covered in soapy water to spread the sealant along the basin edge. This will also assist in developing a smooth surface and guarantee that all holes that might cause leakage are closed by the sealant.
Allowing Time to Cure
In terms of working time, silicone sealant cures and sets. It is recommended that you do not use the basin for at least the first 24 hours, which gives the sealant time to bond into place and stop water seepage.
After the sealant has dried, carry out a final test by turning on the tap and basin to ensure that everything is tightly fixed and all the joints do not leak. By following these vital steps, you can install the BELOFAY vanity unit and mixer tap as professionally as possible and ensure that your unit becomes a beautiful permanent fixture in your bathroom.
Connecting the Plumbing
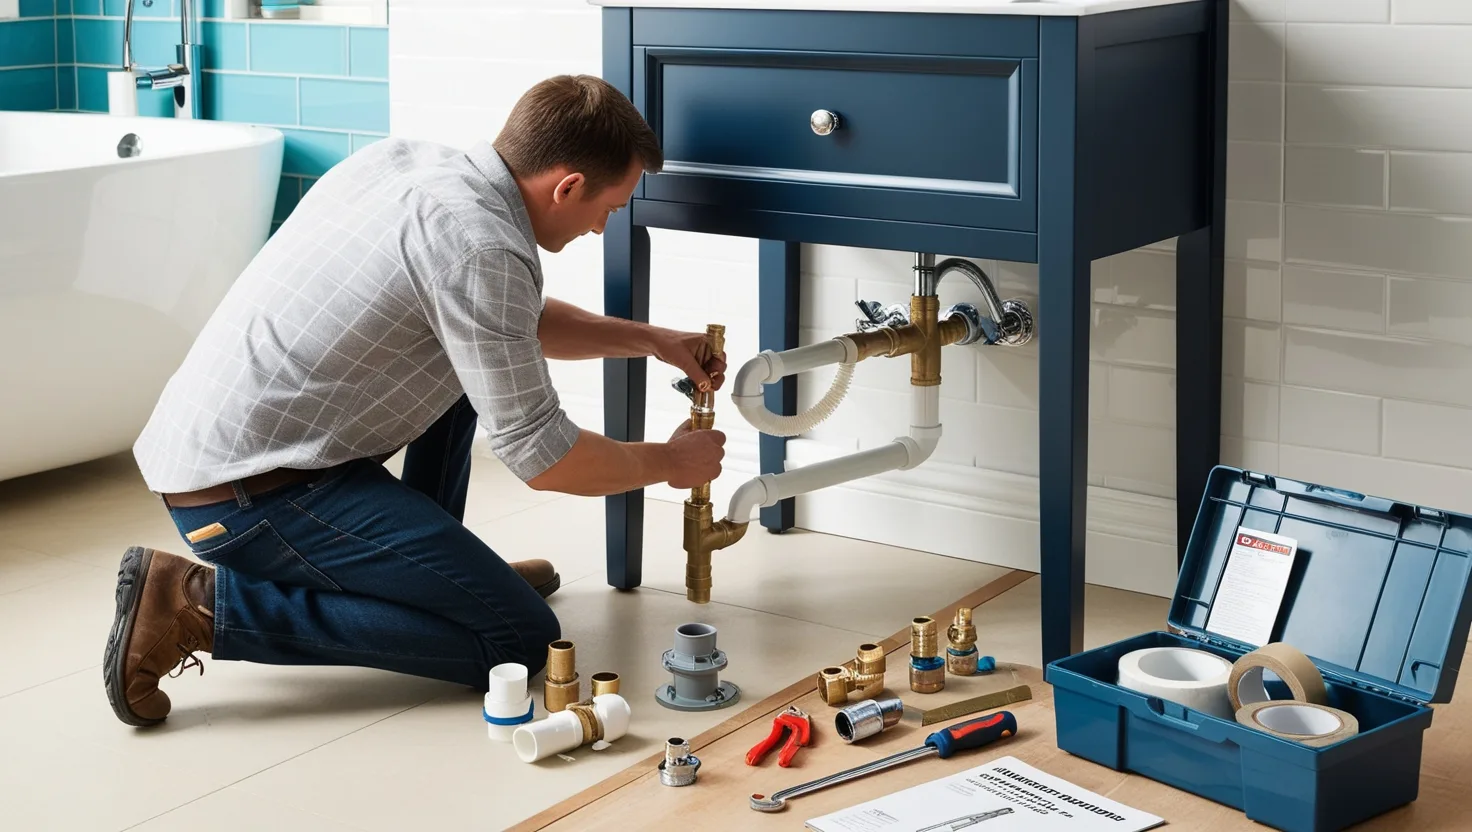
Once the basin and the tap are fitted, plumbing is the last step needed to complete the functionality of your BELOFAY vanity. This guide will teach you how to connect the water supply to the mixer tap using BELOFAY’s adjustable sink waste trap and solve common problems.
Connecting the Water Supply
Prepare the Hoses
The BELOFAY bathroom mixer tap works with 2 flexible hoses for hot and cold water supply. To ensure this, start with the hoses being the right length to allow you to access the water supply valves. If they’re too short, then you should use extension hoses.
Attach Hoses to the Tap
Attach hot and cold water hoses to the respective holding on the mixer tap through screwing. The left side is often marked ‘hot,’ and the right one is marked ‘cold.’ First, tighten using your bare hands only, then use a wrench to tighten to the proper torque. Do not over-tighten, as this is a bad practice since it will cause damage to the connector pegs.
Connect Hoses to the Supply Valves
Fit the other ends of the hoses with the gauges to the valves beneath the vanity sink area. An appropriate connection should be where the hot hose is connected to the hot water valve while the cold hose connects to the cold valve. Once again, screw it on by hand and then apply a wrench for a perfect seal that will not leak.
Turn on the Water Supply
Gradually turn each valve to bring back the water flow to normal at the tap. Control the connections’ leakage by looking for stains or dampness at the coupling points. Any signs of leakage should make you tighten it a little more the next time you are working on it.
Installation of BELOFAY adjustable Sink Waste Trap
Preparing the Waste Trap
Another feature of the BELOFAY adjustable sink waste trap is that it can adapt to a diverse number of basin configurations. First, check that your trap has all its components and has been positioned at your basin’s correct height and angle.
Attach the Trap to the Basin Drain
Fix the waste trap with the absolute end towards the basin’s drain outlet. Insert the provided rubber washer to ensure the water-tight seam before firmly hand-tightening the nut.
Connect to the Wall Pipe
To do this, tilt the bottom of the trap so that its low end aligns with the waste pipe on the wall. The trap of BELOFAY is flexible enough to provide a rosette without the need to adjust and cut it elsewhere physically. After the trap is lined up, firmly tighten the trap connector up to the wall pipe to avoid potential leakage.
Testing the Waste Trap
In the basin, wash it with water to ascertain any leaks in the trap and drain joints. If any of them drip, then tighten them up or apply more plumbing tape layers to have a tight seal.
Troubleshooting Tips
Check for Loose Connections
If there are leaks, ensure all connections are properly sealed. Utilize a wrench to tighten each fitting slightly is required without over-tightening and causing the component to break.
Use Plumbing Tape
In cases of consistent leakage, cover a layer of the plumbing tape around the threads of the connectors and then screw them. This tape creates an additional layer of protection. It thus serves as a spare for metal fittings that experience minor leakages.
Inspect Washers and Gaskets
Check and confirm all rubber washers and gaskets are fitted and are in good condition. Damaged or unfitted washers can also lead to leaks because they are usually exposed to water most of the time. Now and then, you may find that the washers have deteriorated and need to be replaced to ensure the assembly is water-tight.
Test Flow and Drainage
After installation, turn on the tap to allow water to flow and then let the water flow out. Observe if there’s a sign of leakage, measure the flow rate adequately, and ensure the water plumbing drains freely without stagnation.
If you follow the above-listed steps, installing the plumbing for your BELOFAY vanity unit will be relatively easy without making costly mistakes that might lead to leaks and other significant problems. Correct installation and Choosing the right size for your vanity unit will ensure that the new vanity is durable and serves the bathroom as it should be aesthetic.
Final Touches and Testing
Your BELOFAY vanity unit is almost ready, the last step of adding final touches and putting the vanity unit through its paces will complete the look and guarantee that all components will run smoothly. Follow the steps for a professional look:
Attach Doors and Handles
These doors must be securely locked, and the handles must lie flat which is functional and looks good. They are beginning with the placement of the doors on the hinges.
- Grab each door at a time and then screw the hinge on the door head that has been drilled earlier on the area of the vanity frame.
- Fine-tune the screw to make sure the door fits perfectly within the frame and that they open and close as it should.
- Next, attach the handles and align each handle properly to ensure that vanities will be as equal as possible; this may be tightened with a measuring tape.
- Identify the places for the screws and make sure that they are well aligned; then, using a sharp drill, create little holes that will safely hold the screws.
- Screw the handles in place adequately tight to ensure that the door does not bulge when the screws are tight, yet not too tight as to pull the skin of the door in.
- The doors should open and close without sticking to side jambs, be tall, and entirely stop in their frames. This can be observed by cycling the doors a few times.
Leak Testing
Conduct a thorough leak test across all plumbing connections to prevent potential water damage.
- Turn on the Water Supply
Turn on the hot and cold water supply and allow it to run for some time. Carry out a visual test of the hoses connected to the mixer tap so that it will be easy to determine whether it has moisture content or is dripping.
- Check Waste Trap Connections
It is recommended that water be run through the basin with a view of observing the waste trap. Examine the joint of the basin outlet and wall as there are probable signs and symptoms of leakage; if so, then it is compulsory to tighten the joint and apply plumbing tape.
After testing, If there is any leakage remaining, install more plumbing tape or change the washers whenever they seem worn out. Small cracks will help keep the system in good shape in the long run.
Vanity Levelling
An overhead-level vanity is not only aesthetically appealing but must also be for the fixture’s excellent and proper drainage.
- Check Level
Lay a spirit level on the vanity unit. In other words, if the bubble is in the middle of the top of the vanity, it is level. If not, find out which one of the sides is odd.
- Use Shims for Levelling
Place shims underneath the vanity base at the low end. Shims are best made of plastic or wood, and the vanity is fixed until the latter is level.
- Trim Excess Shims
Once the vanity is level, a utility knife should be used to cut any more shim material that extends past the unit’s bottom edge for a smooth appearance.
These last steps help ensure that your BELOFAY vanity is set up to be level, secure, and watertight to endure for the long-term purpose and give the appearance that you desire.
Tips for First-Time DIYers
The installation of a vanity can be a fun and fulfilling DIY job. Still, anyone new at installation must be patient and very keen to get the best results.

Practical Tips
- Take Your Time
Every configuration step must be performed carefully. Excessive pressure can cause the parts to become misaligned, fittings to loosen, and plumbing problems. The prep work required as part of this project should include sufficient time to take precise measurements and ensure that the fixtures are correctly aligned and all connections are firmly made.
- Double-Check Work
It is better to revise the work done in the process, as it allows for identifying mistakes early enough. For instance, ensure you measure for measurements twice or thrice, provide an excellent plumbing connection, and ensure all required parts have been well fixed and in the right position.
- Prepare for Adjustments
Sometimes, it is required to bring some changes, for example, when setting a flat surface or aligning the doors. You should be prepared to adjust the information to fit well for the best results. In addition to the necessary tools, spare pieces, including shims, washers, or plumbing tape, are also helpful.
When to Seek Professional Help
While DIY installations are completed, specific steps may require the help of a professional:
- Complex Plumbing Connections
However, if assembling the water supply lines or fixing the waste trap seems complicated, it will be advisable to contact a plumber. Consequently, mistakes can result in constant dripping or water seepage and, in some cases, damage.
- Persistent Leaks
If, after checking for the leaks, the problem persists, a professional will fix all the defects and make sure everything is as it should be.
- Heavy Vanity Units
When buying large or heavy vanity units, seeking help placing and fixing them is advisable. In this case, professionals can prevent impacts on the walls or the floor during the installation process.
Realising when to ask for help is crucial, and it can save a lot of bucks and guarantee the proper function of your BELOFAY Vanity unit so that you are assured of having an aesthetically appealing finished product.
Conclusion
Installing your BELOFAY vanity unit can be an enjoyable do-it-yourself home improvement job to enhance your bathroom. In this guide, you will learn different techniques for installation, such as measuring, marking, securing, levelling, and connecting plumbing for a professional look. At the end, we described installing doors and handles, checking for leaks, and ensuring installation is stable and level using shims.
By following these steps we have explained in this article will develop a good-looking and efficient workstation that makes you proud. DIY installation also helps save time and money and, at the same time, has the satisfaction of having done it all by yourself. These can bring more flavour and utility to your bathroom, giving this room a stylish look and practicality for years ahead.
Frequently Asked Questions
Do I need to turn off the water supply before installing a vanity unit?
Yes, it is better to turn off the water supply before you fix a vanity unit to avoid soiling the room through a water drip. First, shut down the water supply by closing shut-off valves below the sink if there is any or shut down the overall water supply. Leave the faucet open to drain off water from all the lines, and after the installation is over, turn on the water, looking out for leaks around the joints.
How to prevent leaks after vanity unit installation?
To avoid leaks after the vanity installation, properly flex all pipes that connect to the vanity; do not apply too much force, as this might strain the fittings. Tighten the threaded connections with the plumber’s tape (Teflon tape), mainly where the water supply lines will be fixed. It’s essential to smear the silicone caulk where the sink or vanity meets so that water cannot penetrate in between.
Can you install a vanity yourself?
You may also consider installing a vanity if you possess some plumbing know-how. When it comes to replacement entails removing the preceding vanity, placing the new vanity, fixing it, and installing the plumbing. It helps to use a plumber’s tape on connections so you don’t have any leakages and other things to do before turning the water back on again. In instances where extraordinary changes need to be made, perhaps you should seek the service of a professional plumber.

